Rockspace WiFi Extender Ethernet Input: Use And Connection
Range Extenders are those networking device that help users to expand the WiFi signal services in your house. You can easily purchase a WiFi range extender or signal repeater of some good brands like TP-link, Netgear, Rockspace or more others.
Usually, every extender setup is same but there are some small differences that makes them unique. One of the most used extender brand is Rockspace. It provides plug-in and small range extender devices to the users.
Here in this blog, we will give you information about the Rockspace WiFi extender Ethernet input ports working. Yes, it is a hardware feature of the extender, which is one of the specifications of the Rockspace extender.
You will get every bit of information of Ethernet port usage and one of them is Rockspace extender setup. It helps to install the extender in your house. Take a look at some short section to understand its working and usage.
What Rockspace WiFi Extender Ethernet Input Port is?
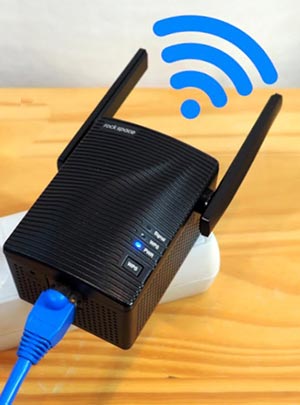
The extender is a part of the network system that connects with your home router. The Rockspace range extender has Ethernet port and power, reset button on it. The Ethernet port is use to link your router by using the Ethernet cable also called network cable.
But inserting the cable is not enough to use the fast internet from the extender. You have to login into the interface of the Rackspace range extender through your computer. So in the upcoming the section of the blog, you will see the working and how to connect your Rockspace extender to the home WiFi router.
Working and linking: WiFi extender Ethernet Input
Here you will see some different parts of the section; one will give you information about the working of the Ethernet port, other will explains how to connect router to extender physically, and last one will contains interface access process within simple steps.
Working
The working is simple and understandable of the Rockspace WiFi extender Ethernet input ports. When you connect a router to an extender via Ethernet cable, then router sends WiFi signals to the extender physically. The extender will expands these WiFi signals into every corner of your home.
So the extender must be linked with the router through the Ethernet cable. There is one more method to connect with extender to router that is WPS button. you will see how to use it in next sub section named ‘hardware installation’.
Hardware Installation
There are two ways you can use to the link your Rockspace extender; one is using the WiFi extender Ethernet input and other is through WPS button. Let’s take a tour of physical connection methods one by one.
Using Ethernet Port
- You have to use the Ethernet cable to connect the router to extender.
- Locate the extender Ethernet input port and router’s LAN port.
- Now, insert the cable ends to the located ports of router and Rockspace extender.
- Turn on the extender by plugging it into the wall socket directly and pressing the power button.
Using WPS Button
- To connect the router to extender without using any wire or cable, just turn on the extender and router first.
- Then, press the WPS button on the home WiFi router and Rockspace range extender.
- Both the network devices will be connected automatically with each other.
But, the setup is not ended yet, to complete it you have to access the interface through your computer or laptop. All the accessing process is given in the next sub section.
Adjust Settings And Networks
To start the login process, you must connect your computer to the extender with the help of the LAN cable. Then you have to open the web browser and search the login URL re.rockspace.local or IP address 192.168.0.1.
The computer screen will take you to the interface login page. Here you will see username and password blank fields. You just have to find login credential into the user manual of the extender. Type in the credentials and hit the Enter button.
You will reach to the interface dashboard, where you can adjust the settings and networks of the Rockspace range extender. You can also change the admin password and update the extender system from this interface dashboard.
So, this how you can use the Rockspace WiFi extender Ethernet input to connect your home router easily.
In Conclusion
Here we come to the end of this blog, in which you have learned the use of Rockspace WiFi extender Ethernet input port. We have also added sections that provided information of working and connection of the extender to router through Ethernet port.