How-to Guide: Fix Rockspace WiFi Extender Login Issues
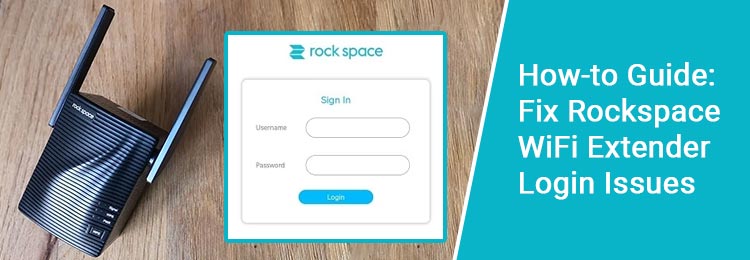
Tens of millions users across the globe trust Rockspace extender when it comes to fulfill their daily internet needs and vanishing all the dead zones of their home. To keep the extender’s performance up-to-the mark, you need to perform Rockspace WiFi extender setup by doing extender login using re.rockspace.local.
But, 4 out of 5 users are unable to do Rockspace WiFi extender login using its default web address, re.rockspace.local. On the off chance, you are also one of them, go through troubleshooting tips and tricks highlighted in this post. But, prior to having a nudge at the troubleshooting tips, we suggest you have a look at the process of doing Rockspace WiFi extender login from the comfort of your home. Why? It seems like you have followed incorrect steps due to which you are facing Rockspace WiFi extender login issues.
Steps to do Rockspace WiFi Extender Login
The step-by-step instructions that will guide you through a hassle-free login process are outlined underneath:
Power on Your Rockspace WiFi Extender
Start the process of doing Rockspace WiFi extender login by plugging it in to a working power socket and power it on. Ensure that you have not used a damaged wall plug for plugging in the extender.
Connect Rockspace WiFi Extender and Router
Once you are done with powering up your WiFi range extender, take an Ethernet cable and use it for connecting your Rockspace device and your host router. You can also use a wireless source instead for connecting them in case you don’t have an Ethernet cable.
Power On Your Client Device
Power on your computer or laptop. Once you are done powering on your client device, connect it to your Rockspace WiFi extender.
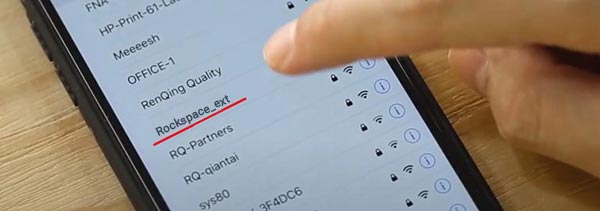
Don’t have an Ethernet cable? No worries! Use wireless source instead. Locate and search for Rockspace_ext (extender’s default network), and connect with the SSID using the correct password.
Load up an Internet Browser
The next step in line to log in to your Rockspace WiFi extender is to load up and internet browser of your choice. Make sure that the web browser version you are using is up-to-date. Bear in mind, an outdated version of the internet browser will give you issues while accessing Rockspace WiFi extender login page.
Use Web Browser’s Address Bar
Then, input re.rockspace.local (extender’s default web address) in the address bar field of your internet browser.
Do not commit typing errors in the extender’s web address. Cross-check it thoroughly after inputting it in the browser’s address bar and pressing the enter key. To save you from this hassle, means committing typing errors, we have an idea of using the copy-paste technique. Double-click on the highlighted term, re.rockspace.local, copy it, and thereafter, paste it in the browser’s URL bar.
After inputting the extender’s web address correctly, press the enter key.
You are All Done!
The Rockspace WiFi extender login window will display. We hope that the above-mentioned tips helped you out to log in to your WiFi range extender.
That’s it! In this manner, you will be able to access Rockspace WiFi extender login page right from the comfort of your home. However, you need to provide the default admin credentials of the device to reach Rockspace WiFi extender setup page, configure it, and thereafter change its settings accordingly.
In the event, following the correct login steps doesn’t bring you luck, jump to the next section right away.
Fixed: Rockspace WiFi Extender Login Issues
Even if after following the Rockspace WiFi extender login steps in the exact given order, you are still not able to rack up success, then it could be due to technical glitches. To get rid of them, we suggest you reboot your entire system.
The steps to reboot your system are outlined in the upcoming section. Scroll down a little!
Step 1: First things first, disconnect your Rockspace WiFi extender and your host router. You also need to disconnect your client device from Rockspace_ext. And, if you have used an Ethernet source, disconnect the Ethernet cable.
Step 2: Turn off your existing router, Rockspace WiFi extender, and your client device (s).
Step 3: Wait for at least half an hour.
Step 4: Thereafter, turn on your router first. After 5 minutes, turn on your Rockspace WiFi extender, and your client device (s).
Step 5: Reconnect your disconnected devices. First, connect your router and extender and then connect your extender and your client device.
Step 6: Try to do Rockspace WiFi extender login again using the instructions given above.
To Conclude
Accessing Rockspace WiFi extender login page allows you to manage it (the extender) remotely from any corner of your house. Anticipating that, the information we have highlighted above will help you log in to your Rockspace WiFi extender while relaxing on your couch.
In case the login page of your range extender is still not loading up, we suggest you see its manual right away.