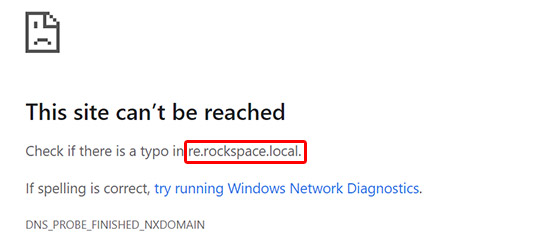
Re.rockspace.local Not Working?
Without accessing the re.rockspace.local login address, it is nearly impossible to complete the setup process of a Rockspace WiFi extender. The URL also plays a vital role in the management of the home network. You cannot assign a new WiFi name to your extender without accessing the login address. But, why is re.rockspace.local not working? You’ll learn everything here.
Call Toll Free For Support: 1-844-765-4831
Why You Can’t Access Re.rockspace.local?
Numerous reasons are there due to which you might be failing to access the local login URL of your Rockspace WiFi extender. But, the dominant one is the use of an incorrect address. Perhaps, you used re rockspace local instead of the correct one. If you have admitted your mistake, then rectify it and use the correct address. Just in case you still fail, you can have a nudge on the following reasons that directly or indirectly prevents access to the re.rockspace.local/login.html portal.
- You are using the search box of the browser for the URL entry.
- The computer in use is not connected to Rockspace_ext.
- Your web browser is demanding an update.
- Unexpected network errors can bug you with the re.rockspace.local not working issue.
- Weak internet connection is there.
- You’ve enabled ad-blockers on the web browser used for the Rockspace management process.
Troubleshooting: Re.rockspace.local Not Working
You might have become aware of the reasons stopping you from accessing the web address of the Rockspace extender. It means, we can now discuss the tips that can help you fix the problem:
- Use the address bar only.
- Update the web browser in use to the latest software version.
- Connect your computer to Rockspace_ext or hardwire it to the range extender.
- Restart the extender as well as your router.
- Try speaking with your ISP to cross-check about network-related issues.
- Disable ad-blockers on the web browser.
Note: Sometimes, antivirus programs also halt access to the local web address of networking devices. Thus, we suggest you disable such programs on a temporarily basis.
Call Toll Free For Support: 1-844-765-4831
How to Use Re.rockspace.local URL for Setup?
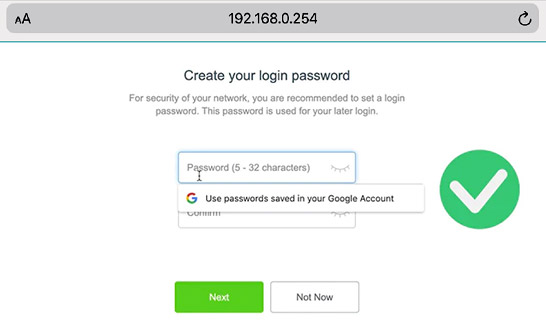
The URL is designated for the setup and management of Rockspace extenders using a computer. Here’s how you can make your device up and running through the URL. You can also use the 192.168.0.254 IP address instead of the login URL.
- Switch on your computer after switching on the Rockspace WiFi extender.
- Join the Rockspace WiFi network or use an Ethernet cable.
- Once done, fire up Google Chrome or similar web browser.
- After that, type the re.rockspace.local login URL and press Enter.
- The admin portal of the extender will appear.
- Create Password and select Next.
- Choose the network to be extended and walk through the on-screen prompts.
- You will soon see the Extended Successfully window.
Note: You can use the same steps to manage the extender after you’re done setting it up. However, you have to go through the login window this time where you have to input the password you’ve created while setting up the extender.
Our Recent Posts
Rockspace WiFi Extender Ethernet Input: Use And Connection
February 23, 2024Range Extenders are those networking device that help users to expand the WiFi signal services in yo...
How to Change 5GHz to 2.4GHz WiFi Frequency and Why?
WiFi routers and extender both are networking devices that provide fast internet connectivity to our...
How-to Guide: Fix Rockspace WiFi Extender Login Issues
February 7, 2024Tens of millions users across the globe trust Rockspace extender when it comes to fulfill their dail...
Re.rockspace.local Login FAQs
There is no default value for the login password of a Rockspace WiFi extender. You can assign your extender a new password at the time of its installation. This password can be 5-32 characters long.
Yes, you always use the 192.168.0.254 IP address in place of the login web address. But, be very sure that your computer is connected to the WiFi network of the extender. Otherwise, you might get an error saying “You are not connected to the extender’s WiFi”.
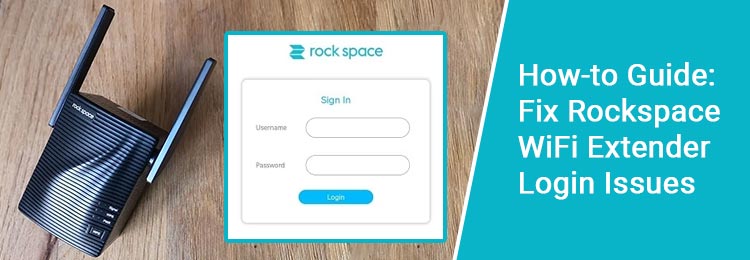
The web address re.rockspace.local will help you complete the Rockspace login process. Just input the address in the browser’s URL bar and press Enter. After that, key in the admin password assigned to the extender to log in.
You can change the WiFi password of the Rockspace range extender by accessing its WiFi Settings tab. Make sure that you assign a strong WiFi password to your range extender. And yes, it must be different from the admin password.
If the login password of the extender is not working, refresh the web browser and update it. On the off-chance you still fail, set up the extender once again.