Can’t Understand Rockspace WiFi Extender Website Instructions
So, you are facing issues while understanding the Rockspace WiFi extender website instructions for login and setting up the device? Need not to worry! Instead you should pat on your back because you have open the right post! Here, we will help you understand the Rockspace WiFi extender log in and set up instructions. Keep reading!
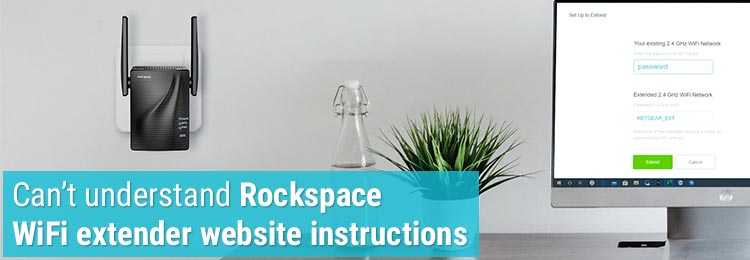
Understand Rockspace WiFi Extender Website Instructions
Look, understanding the instructions provided on the website of the Rockspace extender is not rocket science. You just have to go through them carefully. Still, if you found the instructions a bit tricky, then you must stick to this 7-minute read. Here, we will make you understand and apply the Rockspace WiFi extender website instructions like a pro. Scroll down a little!
First, we will make you understand the Rockspace WiFi extender login instructions.
Understand Rockspace Extender Login Instructions
Here are the instructions that will help you log in to the Rockspace WiFi extender in a hassle-free manner. First, we suggest you read them first, not in a hurry, but peacefully, slowly, with a calm mind:
Step 1: Take an Ethernet cable. Kindly make use of a well-maintained/ non-damage cable.
Step 2: Use the cable to connect your Rockspace WiFi extender and your PC.
A Quick Tip: Don’t stop if you don’t have a PC or an Ethernet cable. Use laptop instead of PC and a wireless source instead of Ethernet cable. Wireless Source? On the list of available networks, just search for the SSID ending with _EXT (by default). Once you find it, get connected to it.
Step 3: As soon as you are connected to your Rockspace extender’s SSID, launch a web browser of your choice on your client device and type http://re.rockspace.local (with or without www) and press the Enter key.
A Quick Tip: Use of an up-to-date internet browser will help you deal with browsing and login-related issues. Yes, that’s true! So, if your browser version is outdated, update it right away, and then put it in use.
http://re.rockspace.local is the default web address of your Rockspace WiFi range extender. And, if it doesn’t work for you, use the extender’s IP address (default) in place of the web address. Your extender’s IP address is, http://192.168.0.1. You can either use the IP with http:// or without it.
Step 4: You will be taken to the Rockspace extender login window. Here, you have to enter the extender’s username and password, and after that, you need to click the Log In button.
In this way, you can access the Rockspace WiFi extender login page.
We hope that where you failed to understand the Rockspace WiFi extender website instructions, you might have understood them via this post.
Now, that you are on the login page of your WiFi range extender, scroll down a little to understand the instructions to set up the device in discussion highlighted below.
Understand Rockspace Extender Setup Instructions
If you failed to understand the manual Rockspace WiFi extender setup instructions provided on the website, then here we are going to provide you one of the best methods and easy instructions to get the job done in blink of an eye. Want to know about that method? Kindly head over to the next section.
Rockspace Extender Setup via WPS
Step 1: Place your Rockspace WiFi extender in the same room or location where you have placed your host router. Make sure that your range extender is receiving the, active, and uninterrupted WiFi signals from your main router.
Step 2: Once you are done with applying the first step, kindly locate and press the WPS button on your Rockspace WiFi extender.
Step 3: Now, within 2 minutes, you have to press the WPS button on your host router as well.
And, in blink of an eye, your Rockspace extender will be configured already using the WPS feature. We hope that you won’t fail to understand the Rockspace extender setup instructions using the WPS method provided here.
The Last Words
And, with that, we now want to wrap up our blog on “can’t understand Rockspace WiFi extender website instructions”. It was really a pleasure to help you! We anticipate that the instructions we have provided you for logging in to the extender and setting it up are understood by you. Please share your feedback regarding this as it may help or be a relevant answer for a thousand Rockspace extender users who have the same query.